(続き). こちらでは、Scratch 3.0のセットアップと、iPhoneのテザリングを利用したインターネット共有の設定までを説明します。
NVM 設定
1. NVM(Scratch 3.0のビルドに必要) インストール
[scratch@localhost ~]$ curl -o- https://raw.githubusercontent.com/creationix/nvm/v0.33.8/install.sh | bash

[scratch@localhost ~]$ echo 'export NVM_DIR="$HOME/.nvm"' >> .bash_profile

[scratch@localhost ~]$ echo '[ -s "$NVM_DIR/nvm.sh" ] && . "$NVM_DIR/nvm.sh"' >> .bash_profile

[scratch@localhost ~]$ source .bash_profile

[scratch@localhost ~]$ nvm install --lts

[scratch@localhost ~]$ nvm use --lts

[scratch@localhost ~]$ sudo yum install git
Server/HTTPD 設定
1. 追加のパッケージをインストール
[scratch@localhost ~]$ sudo yum install epel-release

[scratch@localhost ~]$ sudo yum install http://rpms.famillecollet.com/enterprise/remi-release-7.rpm

[scratch@localhost ~]$ sudo yum install httpd

[scratch@localhost ~]$ sudo systemctl start httpd

[scratch@localhost ~]$ sudo systemctl enable httpd
Scratch 設定
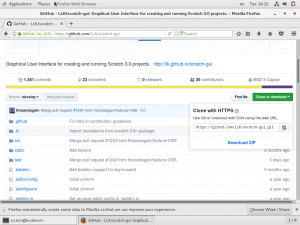
1. こちらのサイトへいき https://github.com/LLK/scratch-gui, [clone or download] をクリック → [Download zip] → [Save File] → [OK]
2. unzip してからインストール
[scratch@localhost ~]$ cd

[scratch@localhost ~]$ unzip Downloads/scratch-gui-develop.zip

[scratch@localhost ~]$ cd scratch-gui-develop

[scratch@localhost ~]$ npm install

[scratch@localhost ~]$ npm run build

[scratch@localhost ~]$ sudo cp -r build/* /var/www/html
Server 設定を行い httpのポート(80)を解放
[scratch@localhost ~]$ sudo groupadd www

[scratch@localhost ~]$ sudo usermod -a -G www scratch

[scratch@localhost ~]$ sudo chown -R root:www /var/www

[scratch@localhost ~]$ sudo chmod 2775 /var/www

[scratch@localhost ~]$ find /var/www -type d -exec sudo chmod 2775 {} +

[scratch@localhost ~]$ find /var/www -type f -exec sudo chmod 0664 {} +

[scratch@localhost ~]$ firewall-cmd --permanent --zone=public --add-service=http

[scratch@localhost ~]$ firewall-cmd --reload
Setup 完了
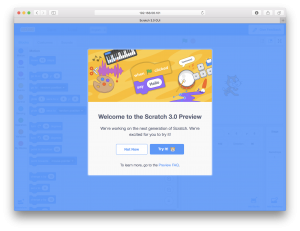
Macbookの Safari(ブラウザ)を開いてこちらにアクセスしてみてください: http://192.168.56.101
Wi-Fi Access Point 設定
1. iPhone と Macbookを USBケーブルで接続します。
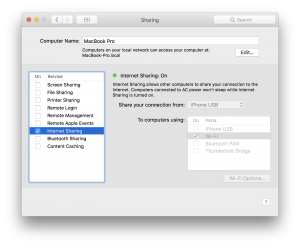
2. [設定] → [インターネット共有] → オン
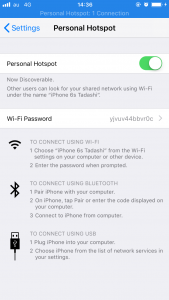
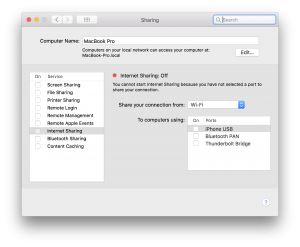
3. MacBook, インターネット共有設定
– [システム環境設定] → [共有]
– [共有する接続経路:] “Wi-Fi”
– [相手のコンピュータでのポート:] “iPhone USB”
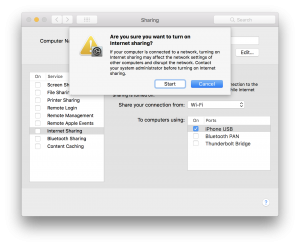
– “インターネット共有” チェック → [開始]
VirtualBox VM 再起動
1. VM Power off (実行中の場合)
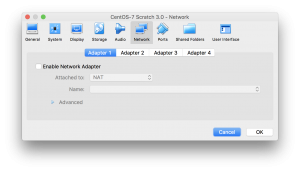
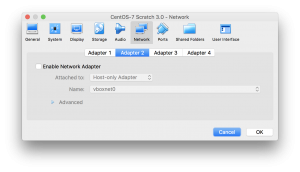
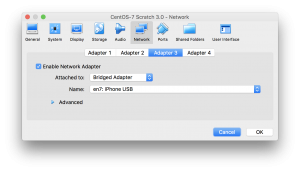
2. ネットワークアダプターを変更
– アダプター 1 と 2 を無効
– アダプター 3を有効 → “ブリッジアダプター”を選択 → “名前:”iPhone USB” → [OK]
3. VirtualBox [表示(H)] → 起動したらサインイン → IP Addressをメモする “170.20.10.XX”
接続完了
1. 他の PCから Wi-Fiの接続先を “MacBook”を選択
2. ブラウザから “170.20.10.XX” へアクセスする。Scratch 3.0が表示される㊗️
Go to:Scratch 3.0 サーバ構築 VirtualBox + CentOS + macOS編 – 1/2

